Is Tile Installation Right for Your Skill Level?
Tiling a backsplash, bathroom floor, or mudroom entry is one of the more achievable intermediate DIY projects - but it's genuinely intermediate. It requires patience, methodical prep, and some comfort with measuring, cutting, and working with setting materials. If you're brand new to home improvement, read through this grounded introduction for beginners before committing to a tile project.
Tile work also involves several sequential steps where a mistake in one phase compounds into problems later. Understanding the full process - not just the glamorous part of placing tile - is what separates a lasting result from one that cracks, loosens, or grows mold within a few years. If you're weighing whether to DIY or hire out, this comparison of DIY versus contractor decisions can help you think through the trade-offs honestly.
Surface Preparation: The Step Most DIYers Skip
No tile installation succeeds on a bad substrate. The surface beneath your tile - called the substrate - must be flat, solid, clean, and appropriate for tile. Common substrates include cement backer board, existing concrete, and properly prepared plywood. Drywall is not suitable for wet areas like showers or bathroom floors.
Check the surface for flex by walking or pressing on it. Any movement means the subfloor needs reinforcement before you proceed. Deflection causes grout to crack and tiles to pop loose, sometimes within months. Sand down high spots and fill low spots with floor-leveling compound, letting it cure fully per the manufacturer's instructions.
Moisture Barriers Matter in Wet Areas
For wet areas like showers, verify that your backer board is moisture-resistant and that seams are taped with alkali-resistant mesh tape before applying mortar. A compromised moisture barrier is one of the leading causes of hidden structural damage behind tile walls. When in doubt about your substrate's suitability, consult a licensed tile contractor before proceeding.
For wet areas like showers, verify that your backer board is moisture-resistant and that seams are taped with alkali-resistant mesh tape before applying mortar. A compromised moisture barrier is one of the leading causes of hidden structural damage behind tile walls.
See this preparation checklist for a broader review of pre-project steps worth completing before you pick up any tools.
Planning Your Layout Before Any Tile Is Set
Dry-laying your tile - placing tiles without adhesive to visualize the final pattern - is a step worth every minute it takes. Start by finding the center of the room or surface and work outward. This approach ensures the most visible areas have full, symmetrical tiles, and cuts are pushed to edges where they're less noticeable.
Use chalk lines to mark your reference lines at true right angles. Check corners with a framing square; walls that look square often aren't. Once you're satisfied with the layout, mark the position of your first tile precisely. This reference point anchors the entire installation.
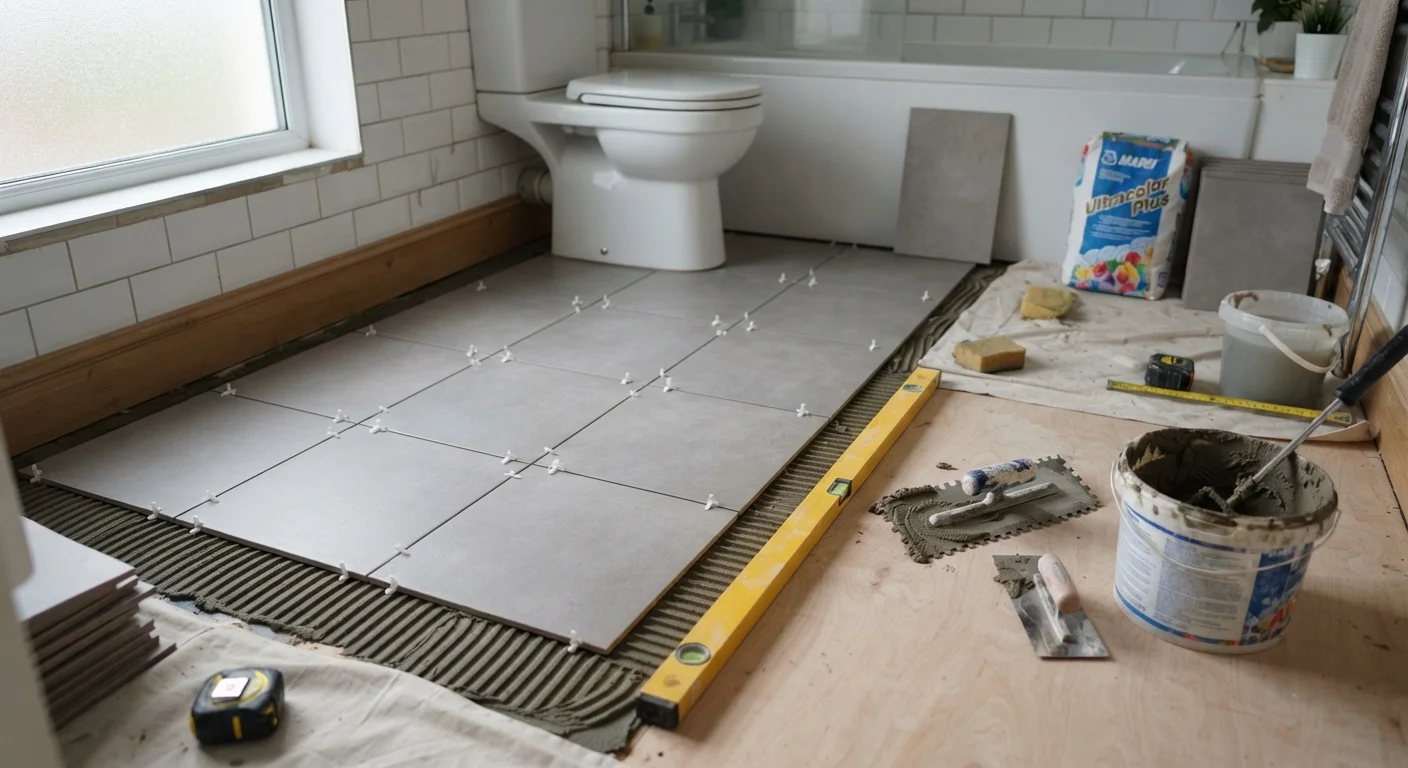
When spreading mortar, comb lines in one direction - not swirled - so air can escape as you press tile down. Swirled mortar traps air pockets that become hollow spots.
Hollow spots reduce tile-to-substrate contact, which is the primary cause of tile cracking and loosening under normal foot traffic or thermal movement.
Before mixing your first full batch of mortar, do a small test set in an inconspicuous corner and pull up a tile after 10 minutes. At least 80% of the tile back should be covered with mortar.
This quick check confirms your trowel size and mortar consistency are correct for the specific tile you're using - conditions that vary between tile types and brands.
Account for grout joint width in your dry layout. Tile spacers - typically 1/16" to 1/4" depending on tile type and your preference - hold consistent spacing but must be factored into how cuts land at the perimeter. A difference of 1/8" across a 10-foot room adds up to more than an inch.
Setting Tile: Mortar, Spacing, and Technique
Most floor and wall tiles are set with polymer-modified thin-set mortar, mixed to a peanut-butter consistency. Use a notched trowel - the notch size is chosen based on tile size, and the bag or tile manufacturer's guidance is your most reliable reference. Spread mortar only in sections small enough to tile before it skins over, typically 2-3 square feet at a time for beginners.
Back-butter large-format tiles (roughly 15 inches or larger on any side) in addition to spreading mortar on the substrate. This ensures full contact and prevents hollow spots that crack under foot traffic. Press each tile firmly with a slight twisting motion, then check it with a level and adjust before the mortar grabs.
Insert spacers at every corner as you go. Remove spacers before the mortar fully cures - usually after several hours but before the full 24-hour cure is complete. Allow mortar to cure fully before walking on the tile or applying grout; rushing this step is one of the most common causes of tile failure.
80-95%
Minimum mortar coverage required
Industry standards from the Tile Council of North America specify 80% coverage in dry areas and 95% in wet or exterior applications.
24-48 hrs
Typical thin-set cure time before grouting
Most polymer-modified thin-set manufacturers specify a minimum cure period before grout application; actual time varies by product and conditions.
Grouting and Sealing: Finishing the Job Correctly
Grout fills the joints between tiles; it is not decorative afterthought. Choose sanded grout for joints wider than 1/8 inch and unsanded for narrower joints. Mix to the manufacturer's consistency, then work it diagonally across the tile surface with a rubber float, pressing it firmly into joints.
Remove excess grout from tile faces in two passes: first with the float held nearly vertical to scrape, then with a damp sponge in broad, arcing strokes. Rinse your sponge frequently and avoid over-wetting - excess water weakens grout. After the surface haze dries (typically 15-30 minutes), buff it off with a dry cloth.
Sealing is a separate step and applies to the grout, not the tile itself in most cases (some natural stone tiles also require sealing). Grout sealer is applied after the grout has fully cured - often 48 to 72 hours - and it resists moisture and staining. Skipping sealer in a bathroom or kitchen means grout that discolors and harbors bacteria within months. Reapplication every one to two years is generally recommended, though follow your specific product's guidance.
If you're tackling a bathroom project more broadly, this bathroom refresh guide covers how tile work fits alongside grout cleaning, fixture updates, and other lower-effort improvements.
Common Mistakes and How to Avoid Them
Even experienced DIYers encounter predictable pitfalls in tile work. The most frequent:
- Skipping the dry layout: Results in awkward cuts, unbalanced patterns, and tile waste.
- Insufficient mortar coverage: Tiles with hollow spots - less than roughly 80% contact in dry areas, 95% in wet - will eventually crack or loosen.
- Grouting too soon: Disturbing the mortar bed before it cures shifts tiles out of alignment.
- Using the wrong grout: Sanded in tight joints scratches tile faces; unsanded in wide joints shrinks and cracks.
- Forgetting expansion joints: In larger installations, control joints or soft caulk at transitions allow for natural movement and prevent cracking.
If your project touches a shower pan, heated floor system, or involves removing structural elements, those phases generally require permits and - in many municipalities - licensed trade work. Always check local building codes before starting. If tile feels like too large a commitment, explore other flooring options that may better fit your timeline and skill level.
Know When to Stop and Call a Professional
If you discover soft subfloor, signs of water damage, mold, or structural issues during surface prep, stop work immediately. These conditions require a licensed contractor - sometimes a structural engineer - before any tile installation can proceed. Tiling over hidden moisture or rot accelerates damage and can create serious health and safety hazards.